11.01.2011

Tattoo Design - Personal Final [Kinda]


This was my first initial drawing layout of the Blossom for my tattoo,
I decided I wanted to give the blossom a feel that would make it personal to me.
There aren't many flowers, this is because there are only 4 in my family.
I'm the baby one of the family so I'm the bud.
Even though over time I've become taller and mature I'm still the baby one when we are all together.

My mother and father are the two flowers that are together, and then in the family tree rooted down is my sister the other flower alone above me. The bud.


This is my inked version of the Blossom idea, It looks a lot better once inked, 
I want to add shadows to the stems but I might just leave that up to the tattooist as I want a personal opinion on this. I've seen many tattoos where the shading is done badly or hardly at all.
I know I don't want it too blackened out.

Let me introduce you to the Cardinal.
These are robust, seed-eating birds with strong bills. The family ranges in size from the 12-cm, 11.5-gram Orange-breasted Bunting to the 25-cm, 85-gram Black-headed Saltator[verification needed]. They are typically associated with open woodland. The sexes usually have distinctive appearances; the family is named for the red plumage (coloredcardinal like the color of a Catholic cardinal's vestments) of males of the type species, the Northern Cardinal.
The "buntings" in this family are sometimes generically known as "tropical buntings" (though not all live in the tropics) or "North American buntings" (though there are other buntings in North America) to distinguish them from the truebuntings. Likewise the grosbeaks in this family are sometimes called "cardinal-grosbeaks" to distinguish them from other grosbeaks. The name "cardinal-grosbeak" can also apply to this family as a whole.

Cardinal's have been my favorite birds throughout the years. They have stuck by me and shone brighter then anything else. Not many people know that Cardinal's are my favorite birds, I don't let it on too often as i love all types of birds. Birds remind me of my nanny, whom died when I was turning 1 or 2. She used to sit in the garden and look at the birds, a Robin used to come to her garden very often. When she passed away my grandfather used to sit in the garden and look at the birds to take his mind away from the pain i'd imagine. That Robin still came.
------------------------------------------------------------------------
Cardinals mean a few things, actually. 
The one i like best is "Vitality and/or happiness." Another I found is 
"Brings colour to your life and reminds you that all you do is important, you are someone who brightens others lives"

-------------------------------------------------------------

So here we go I've come up with it:


This is my final Tattoo design.
It symbolizes a lot to me as you can tell in my first draft of the tattoo at the top.
The Cardinal flying symbolizes me growing up, leaving college/eduction and being my own life changer. I make my own decisions now.
[Cardinal and feather will be in colour Blossom will be in B&W]
I've been through a lot of things in my life and I've just blossomed out of most (see what I did there?)

The feather falling from the bird is showing me leaving my past behind. Anything thats gone on in the past is forgotten. If you dwell upon these things. You'll just get yourself down and ruin whatever could be coming your way.

this tattoo means so much to me and I'd love for people to ask what it means and be moved by the story behind it. Every good tattoo needs a story behind it, thats what makes it so unique to you.


Hope I've inspired you.


10.25.2011

I'm so sorry guys.

I've been dead for a while. I've recently got a job at C & J Clark Shoes International HQ as a Contact Centre Agent. Been working full time and devoting my leisure time to sims 3 haha!

Rest assured, I've been to the wedding and taken the photos. They will be up on my website ASAP.
I got paid £200 for the job and I'm making them an online book also. *Will link you once made*

Sorry again guys!
I haven't disowned you!

Mucho love.

9.23.2011

The worst enemy to creativity is self doubt

 As an artist, there’s nothing more intimidating than a blank canvas. And self doubt is something that I struggle with in every aspect of life, not just art. This quote always reminds me to let go of any insecurities that are holding me back.

9.18.2011

Chocolate Overdose Cake.


Ingredients:
For the brownie base:
1/2 cup plus 2 tbsp. cake flour
1/4 tsp. salt
1/2 tsp. baking powder
3 oz. unsweetened chocolate, chopped fine
6 tbsp. unsalted butter, cut into 6 pieces
1 1/8 cups sugar
2 large eggs
2 tsp. vanilla extract
For the chocolate mousse filling:
6 oz. semi-sweet chocolate, broken into 1/2-oz. pieces
1 7/8 cups heavy cream
1 tbsp. sugar
For the chocolate cake:
2 oz. unsweetened chocolate, coarsely chopped
1/8 cup Dutch-processed cocoa
1/4 cup hot water
7/8 cup sugar, divided
7/8 cups unbleached all-purpose flour
3/4 tsp. baking soda
1/2 tsp. salt
1/2 cup buttermilk
1 tsp. vanilla extract
2 large eggs
1 large egg yolk
6 tbsp. unsalted butter, soft
For the ganache:
1 1/2 cups heavy cream
2 tbsp. unsalted butter
18 oz. semisweet chocolate, broken into 1/2-oz. pieces 
Directions:
To make the brownie base, line the bottom of a 9-inch springform pan with a round of parchment paper and spray the sides with nonstick cooking spray.  Center a rack in the oven and preheat to 325 degrees F.  In a medium bowl, combine the cake flour, salt and baking powder.  Stir with a fork to mix.  Melt the chocolate and butter in a large heatproof bowl set over a saucepan of almost-simmering water, stirring occasionally, until smooth.
When the chocolate mixture is completely smooth, remove the bowl from the saucepan and gradually whisk in the sugar.  Add the eggs one at a time, whisking after each addition until thoroughly combined.  Whisk in vanilla.  Add in the flour mixture in two additions, folding with a rubber spatula until completely homogenous.
Transfer the batter to the prepared pan and smooth with a spatula.  Set aside, prepare the cake batter, and bake the two layers at the same time.
To make the cake, line the bottom of a 9-inch round cake pan with a round of parchment paper.  Grease and flour the sides of the pan.  Combine the chocolate, cocoa and hot water in a medium heatproof bowl; set the bowl over a saucepan containing 1-inch of simmering water and stir with a rubber spatula until chocolate is melted, about 2 minutes.  (Note: at this point, my mixture was pretty thick and I thought I had ruined it, but mixing in the sugar was like magic and it made it smooth and liquidy again.)  Add 1/4 cup of sugar to the chocolate mixture and stir until thick and glossy, 1 to 2 minutes.  Remove bowl from heat and set aside to cool.
Whisk flour, baking soda and salt in a medium bowl; set aside.  Combine buttermilk and vanilla in a small bowl.
In the bowl of a stand mixer fitted with the whisk attachment, whisk the eggs and yolks on medium-low speed until combined, about 10 seconds.  Add remaining sugar, increase speed to high, and whisk until fluffy and lightened in color, 2 to 3 minutes.  Replace whisk with paddle attachment.
Add the cooled chocolate mixture to the egg/sugar mixture and mix on medium speed until thoroughly incorporated, 30-45 seconds, pausing to scrape down sides of bowl with rubber spatula as needed.  Add softened butter one tablespoon at a time, mixing about 10 seconds after each addition.  Add about one third of the flour mixture followed by half of the buttermilk mixture, mixing until incorporated after each addition (about 15 seconds).  Repeat using half of remaining flour mixture and all of remaining buttermilk mixture (batter may appear separated).  Scrape down the sides of the bowl and add remaining flour mixture; mix at medium-low speed until batter is thoroughly combined, about 15 seconds.  Remove bowl from mixer and fold batter once or twice with rubber spatula to incorporate any remaining flour.  Pour into prepared pan; smooth batter to edges of pan with an offset spatula. 
Bake the brownie and cake layers at the same time: the brownie for 25-30 minutes and the cake for 30 minutes, or until a toothpick inserted in the center of each comes out clean.  Transfer the pans to a wire cooling rack.  Allow the brownie to cool completely in the pan.  Allow the cake to cool in the pan for 15 minutes, then invert onto the wire rack and allow to cool completely.
Once the brownie layer has cooled, run a knife around the edges to separate it from the pan.  Remove the sides of the springform but leave the brownie layer on the springform base.  Form a ring of parchment paper around the brownie layer and extending up the sides of the springform pan – reclose the springform so that the parchment is fitted tightly to the sides. 
To make the chocolate mousse filling, place a stand mixer bowl and whisk attachment in the freezer or fridge.  Heat 1-inch of water in the bottom half of a double boiler over medium heat.  Place the semisweet chocolate in the top half of the double boiler.  Tightly cover the top with plastic wrap and allow to heat for 8-10 minutes.  Remove from the heat and stir until smooth.  Transfer the melted chocolate to a stainless steel bowl and set aside until needed. 
Place heavy cream and sugar in the well-chilled bowl of an electric mixer fitted with the chilled whisk attachment.  Whisk on high speed until stiff peaks form, about 1 1/2 minutes.  Remove the bowl from the mixer.  By hand, whisk to combine 1/4 of the whipped cream into the melted chocolate until smooth and completely incorporated.  Add the combined whipped cream and chocolate to the remaining whipped cream and use a rubber spatula to fold together. 
Spread the mousse over the top of the brownie base evenly.  Use an offset spatula to smooth the top.  Place the cooled cake round over the mousse, pressing down lightly.  Chill for at least 1 hour.
To make the ganache, heat the heavy cream and the butter in a saucepan over medium high heat.  Bring to a boil.  Place the semisweet chocolate in a 3-quart stainless steel bowl.  Pour the boiling cream over the chocolate and allow to stand for 5 minutes.  Stir until smooth.  Chill 1 cup of ganache for 1 hour.  Allow the remaining ganache to come to room temperature (about 40 minutes).
Remove the springform ring and parchment collar from the assembled cake.  Carefully transfer the cake to a serving platter, removing the springform base and parchment round.  Use a spatula to smooth the room temperature ganache over the cake top and sides, covering evenly.
Place the chilled ganache in a pastry bag fitted with a shell tip and pipe a shell border around the base of the cake.  Pipe 12-16 rosettes around the top of the cake to indicate servings.  Serve chilled and store leftovers in the fridge.  Cut the cake with a hot, dry knife.
Source: adapted from Confections of a Foodie Bride

9.15.2011

Photoshop Tutorial; Watercolour Effect.

I thought I'd show you guys another photoshop tutorial I've found, This one is to do with watercolours. You can download a set fo brushes from here and I got my textures from here. I found this tutorial online and I think it was pretty well explained, I managed to do it within 20 minutes of trial and error with the brushes. When they explain to get a watercolour texture and merge the layer, I just downloaded brushes instead and had more freedom of where they were placed. 
So this is the tutorial's final image: Click on the image for the tutorial btw.

And this was my final Image, I did it quite a bit different to the tutorial but you can tell when something looks good.

*hehe it looks like he's got a runny nose*

 To get it as your wallpaper the link is here

Priority Tickets; O2

The Black Keys; possibly one of my favorites' of most bands to walk this earth. They are two brothers who create such enthusiastic music. I really would love to see them live. And this time because of O2 Priorities I get first dibbs on tickets!! Just when will I be able to get to Nottingham/Manchester/London. London will probably be the most likelihood. Let's see if I can.

UPDATE: New Camera Bag.

Hey guise! I just recently got in touch with the man (or woman infact) that I bought my camera bag from in Korea. The package was stuck in brazil for a while hence why I hadn't blogged about it earlier. Surfing the net today and Scott my postman came and delivered to me my new camera bag! I scrambled to find a knife to open it and started taking photos instantly. Ahh I love it. Perfect for Rally day this saturday and Longleat whenever I go.


Then of course I had to take photos of my camera and lenses in the bag. 
Photos Taken on Samsung Galaxy Ace; FXCamera application.


Modeled by my mother.

Inside: Holding my Camera, My standard 55mm lens and my Fish-eye/Macro adapter lens.

Which reminds me. I need a lens cloth or to get new filters with a lens pen.
Post haste this needs to be done before I forget!!

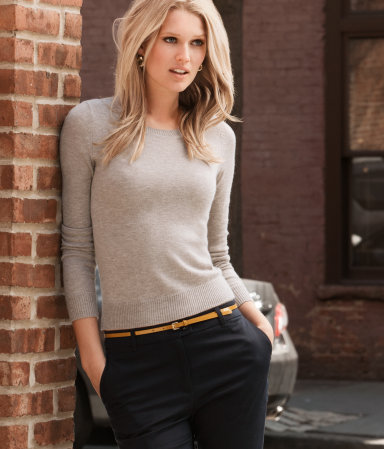
New wardrobe to be: Thinking about Autumn.


&DENIM Jeans £7.99


Parka £34.99


Top £14.99


Blouse £9.99

Jumper £14.99

Jumper £12.99

Trousers £12.99

3-pack belts £7.99

Belt £6.99 £9.99

Nail varnish £0.99

Eyeshadow brush £1.99